To use a png file so it does not give you the white edges or white nasties as we call them. You composite the PNG on a base black image. This is what can happen outputting a PNG straight away in jpg format. EWEOO! Example of the white nasties: 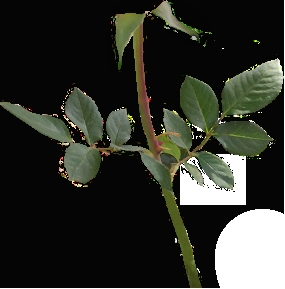
Image #1.) To use PNG's so they remain a clean crisp image. The trick is to COMPOSITE THEM on a base image. Like a black jpg 400x400 for instance. The png 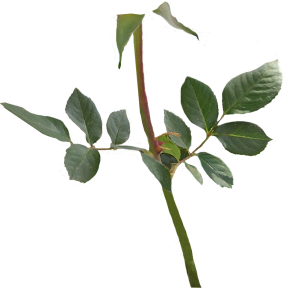
Image #2.) The completed composite of the PNG on a black jpg. Example: 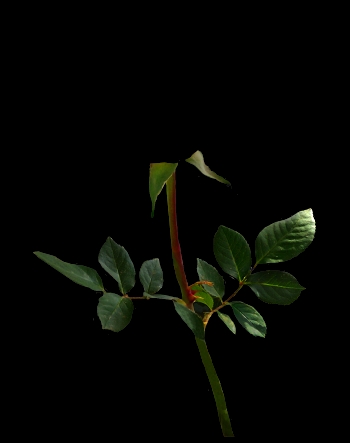
Image #3.) The above image Is done by compositing, OVER the stem1.png: stem1.png (Same as shown above Image #2.) On a large biack base image. Then compositing "Multiply" on top of the image again. .................................................................................... This is what we were seeing PC side. Usually we don't run into this problem. =It's the way the .psp file was made originally= This Is the problems source. =snip= Subject: Re: stem1.jpg OMG! If I had not seen this with my own eyes, I would not of ever believed it. So I did a quick screenshot so you could see it, too. In the top left is the png I sent you...(Transparent). Underneath that is the stem you tried to work on and sent to show me where the whites are. She is talking about this image which is the one that was NOT composited on a black jpg. It was output and the format was changed from png to jpg is all: Image #1.) To the Right...the big pic is the same png I sent you, and it is just laying on a black layer = Image #2.) NO WHITES! I magnified it right up to the point on the leaves to see if there was anything there and there isn't one odd pixel to erase? So...I don't know what to do... There is nothing I -can- do! This is a first for me! 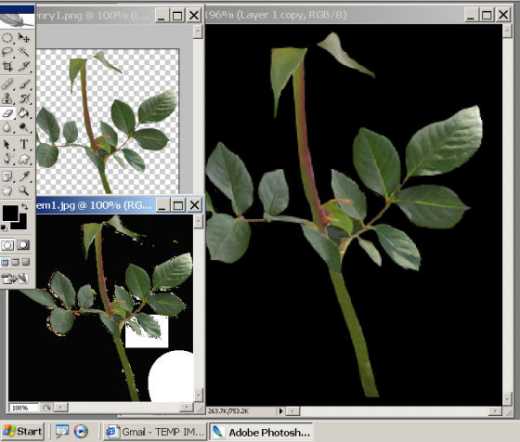
=/end snip= She tried Adobe Photo Shop and it was better but still had white nasties. The stem turned a redish color in some places. So I didn't keep it. The first one was converted from PSP format to PNG using PSP 7. This was the better of the two to work with IMO. ::Update:: Now that I have had some time behind a PC keyboard. I know that that there is a way to solve this problem. You would convert the image to jpg and re-tube it. Using your image editing program of choice. Clean it up again by painting out the white pixels with black. Then making the black background transparent. Save in the format you want. .tub, .psp, .psd, .png ect. ::Tip:: Most image editing programs have a work area background default of white. When cleaning up a image to tube. Clean up the edges of the image with black then transparent the black pixels. This will give you a cleaner image generally speaking. However the opposite can happen where you have the "Black Nasties" instead of the "White Nasties" when compositing on a light colored background. Rule of thumb. Is to work on whatever color background you will be putting the image on when finished. If compositing onto a patterned background. Select a color that will blend well with the background. This files URL is: 1-ABOUT_using_PNGs.html Four Tutorials About PNG Format 1.) PSP Tubes-2-PNG's White Edges By Pink! 2.) Rose Leaves - More About Using PNGs 3.) PNG's and Imagemagick? 4.) PNG Format: PSP, Adobe PhotoShop & WebTV PNG's Stars Image Resource |